Video Recording Tools for Educators
From video recordings with talking heads, to screen captures with picture-in-picture webcams, crafting educational video content can be a time-consuming process. In this book and the online course, you will learn how to create engaging videos efficiently with a variety of media sources. In essence, you will learn how to mix multiple media sources to create visually engaging content. Video recordings can be a very valuable resource for students.
As an educator, you already understand the power of storytelling. For some, storytelling comes naturally, but for others it is a skill that takes practice. As you create videos, it’s important to remember that you are essentially telling educational stories that you want your students to connect with. Therefore, it’s important to understand the core storytelling process.
Let’s start by recognizing and understanding the hero in your story. As an educator, you are the guide who works with the hero to achieve their goal. View each video in your course as a mini-lesson or quest that is helping the hero on their journey. If you are able to position your students as the heroes of their own stories, you will be well on your way to enabling them to tell stories that they can connect with.
As a storyteller, acknowledge students as the hero of their own story. You can also reiterate your role in the story by letting students know you are here to guide them. You can do this by including short segments inside your videos reminding students of your availability to respond to comments and answer questions.
Video Recording Tools for Educators
The illustration above outlines a classic story setup that has been used in Hollywood movies and literature. This specific “Classic Story Setup” comes from a book called “Build Your StoryBrand.” As you apply this storytelling process to your online courses, you are the guide, and the students are heroes. In the beginning stages of your online course, you identify problems that students have and demonstrate your willingness and ability to help solve those problems.
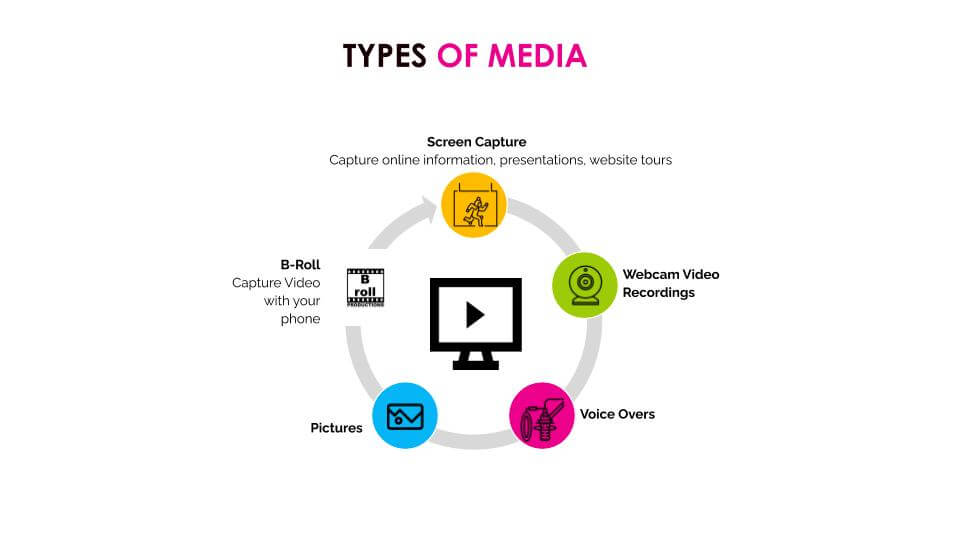
Types of Media Educators should use
Too many students become disconnected from their own educational story because they do not connect with the real world problems teachers are helping them to overcome. Consider both internal and external problems that your educational course will help students solve and create a story that students will connect with. For example, if you are teaching math students in high school, tell them about the importance of managing their finances. Go into detail about all the great jobs that require math skills and the risks of being unable to handle important financial matters in their lives. Use real-world examples that students can relate to.
Next, offer your students a plan right upfront. Explain to students exactly how you are going to help them solve an important problem related to your course topic. Give students an overview of the course in its entirety, along with the resources you are providing to help them along the way. It will be easy to “Call Them To Action” because you will ask them to start learning via the online materials you have prepared for them.
Now, let’s review some essential video recording tools that will help you optimize your success with online education.
Ezvid
Ezvid is a wonderful video recording tool that is 100% free but only available for Windows. With this tool, you can easily capture and edit videos all with a single interface. You can capture everything that shows up on your computer through a screen capture feature that is perfect for Powerpoint presentations, video clips, and website browsing. It’s nice to have a tool that not only records video, but also allows you to split your recordings and add supporting audio, text, and post-production elements. You can even control the speed of the video, to turn boring video footage into a fun and fast overview, or slow-motion dramatic moment.
Blueberry Flashback Express Recorder
Though this may seem like just an everyday recorder, it is actually made to help you capture your screen during live webcam sessions. This software is also only available for Windows and the more advanced features do require payment.
Screen Recorder (Chrome Extension)
Chrome extensions are great because they do not require any download. All you need to do to use is click the “Add To Chrome” button that is available from the Google Chrome store. The Google Chrome store can be found at https://chrome.google.com/. You can search for “Screen Recorder” and start using it on any computer with Google Chrome in minutes.
Once installed, Google Chrome extensions are made available as little button next to the Google Chrome browser bar. When you click the little Screen Recorder button next to your web-browser it will simply ask you if you would like to record from your webcam or your screen. The only other option is to choose your included audio source. It’s that simple. It’s 100% free, and you can use it as much as you want.
iMovie
The iMovie app is popular with Mac users because it comes installed on most Mac computers. The app can be used to turn pictures and video clips into more cohesive video content. The application allows you to mix and match video clips into a storyline that can include text overlays, music, and backgrounds. You can import video files by simply dragging them into the iMovie project folder.
Open Broadcasting Software (OBS)
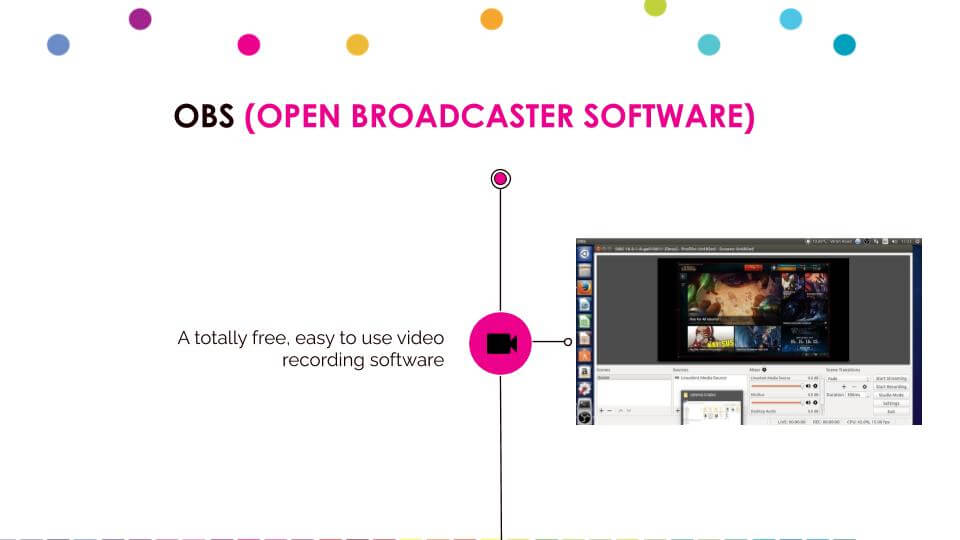
Using OBS for Video Creation
OBS is another free tool that is easy to use for video recording. OBS will become a central focus of this book because it can be used to organize multiple video clips and live video sources into a single produced video. Therefore, as an educator, you can use OBS to create and record new video content that integrates previously recorded video clips.
You can use OBS to create videos from student-submitted work, or your own videos captured with your smartphone and turn them into a larger project. In an upcoming tutorial, you will learn how to combine your webcam’s video with a document camera and a screen, capturing a presentation all at the same time. On top of that, you can play additional video clips, share photos, and much more as you record a video for your upcoming course. This process is called “live video production” and it does not require post-production. This is ideal for teachers because it’s a huge time-saver.
In comparison another popular video recording tool such as Zoom, OBS provides more control and flexibility. Zoom recordings tend to be a mix of a webcam and a picture in picture webcam. Therefore, your recordings start to look a lot like “talking heads” and less like a polished video recording. With OBS you can record “chunks” of videos and stitch them together. So for example, you may record an interview with zoom and then import that video into OBS and use it inside your larger project.
You can download OBS at OBSProject.com for Windows, Linux, or Mac. For now, familiarize yourself with the idea of creating a video in a live environment. Imagine yourself in front of your computer, with multiple video clips that you are ready to “curate” into a video experience for your students to watch. Press record, and explain the presentation to your students with your webcam source on. Then transition to some digital assets you have prepared, including a video clip from your class, some student-submitted pictures, and a worksheet that you will complete as it’s being recorded with a document camera. Each of these digital assets is switched to inside of scenes that you have set up. Assuming you have become familiar with OBS, you will be able to que up your video assets and create an engaging video for your online course faster than any post-production tools available today.
Conclusion
Video recordings are a valuable way to enhance the overall experience students have with your class. Video recordings offer students another primary content resource and they are customized and therefore, relevant to your course. You should start by experimenting with multiple ways of capturing video. This could include your smartphone, a Zoom call, a document camera, or a screen capture session. Once you start to capture video clips that you believe are valuable, you should consider mixing them with a voiceover, a webcam, and other sources that you will learn about in this book.
Key Takeaways:
1. Learn how to record, shoot, and edit video. A review of the different types of software you can use to capture video.
2. Manage multiple media clips and turn them into a custom video using OBS, a free video production software.
3. Understand the different types of video recording: talking heads, screen capture with a webcam, live production (saves time), and post-production (time-consuming) to generate content for your classes. OBS enables you to create “chunks” of video very easily.
4. Essential video creation tools can help you bring students into your virtual classroom in a fun way. Share live and pre-recorded video content with your studentsShoot video on your own so you can insert relevant clips into your presentations and lessons.
More Technology Tools for Online Education
- Download the full book Technology Tools for Online Education here
- Learn about video recording tools for educators here
- See the latest video communications tools for online education here
- Learn tips for using a document camera in the classroom here
- Tips for using touch screens in the classroom here
- Tips for using smartphones in the classroom here
- Learn about the role of the flipped classroom in online education here